

Sending Images to Web Services (CANON iMAGE GATEWAY/SNS/Email, etc.) (PowerShot SX70 HS)
Solution
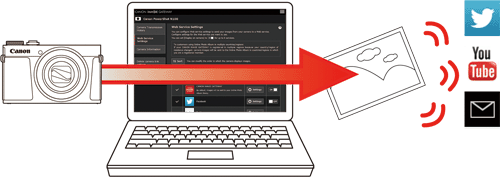
CANON iMAGE GATEWAY is a free service for Canon users. When you perform the settings to link the camera to CANON iMAGE GATEWAY, you will be able to send images from the camera to social network services supported by CANON iMAGE GATEWAY (CANON iMAGE GATEWAY/SNS/Email).
This section explains how to access Canon Image Gateway to use various Web services.
Please check [Help] at the CANON iMAGE GATEWAY top page to learn about the Web service settings.
Supported Web Services:
- CANON iMAGE GATEWAY Online album
- YouTube
- Flickr
- Google Drive
- Canon Irista
IMPORTANT
- For more information on CANON iMAGE GATEWAY system requirements and information on countries and regions where the service is available, please refer to the CANON iMAGE GATEWAY top page.
- You must have an account with Web services other than CANON iMAGE GATEWAY if you desire to use them. For further details, check the websites for each Web service you want to register.
- Separate ISP connection and access point fees may be applicable.
- You can use Canon Irista if your country/region registered with CANON iMAGE GATEWAY is Europe, MiddleEast, Africa, or Australia.
NOTE
- Computer/smartphone setting procedures are indicated by the
 icon.
icon. - Camera setting procedures are indicated by the
 icon.
icon. - Interface or functions of CANON iMAGE GATEWAY are subject to change, for application improvement. In such a case, features of CANON iMAGE GATEWAY may differ from sample screens or operation instructions in this explanation.
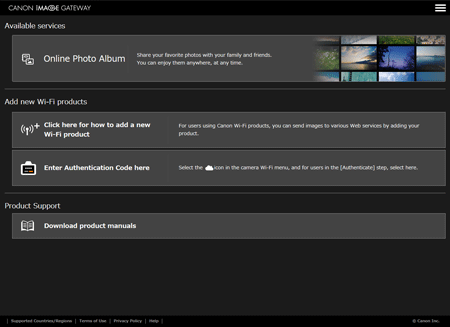
1. Access http://www.canon.com/cig. 2. Click [Start].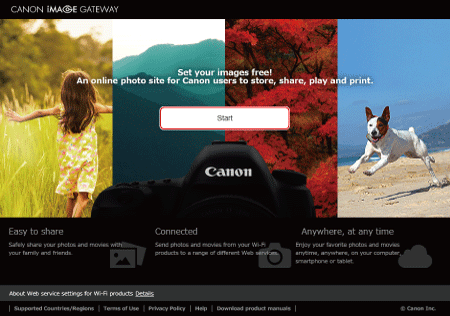 3. To sign up, click on [Create a Canon ID account] and follow the instructions.
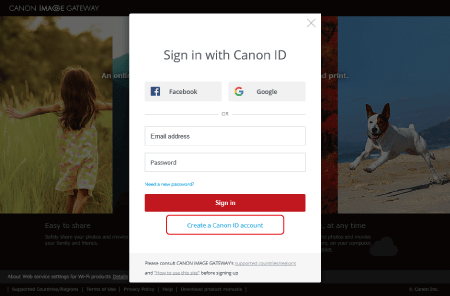 4. Once an account has been created, follow the instructions until the page shown below is reached.
- For PC
- For Smart Phones
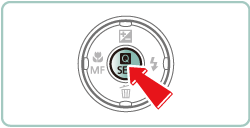
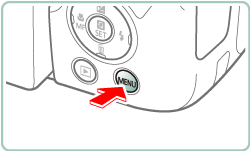
 1. Press the
  button.
NOTE
- When the following screen appears, press the
 button.
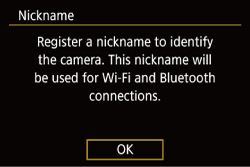
- To use the nickname displayed, press the
 button.
- Nicknames are 1 - 8 characters and can be changed later. For more information on using the keyboard, please refer to "On-Screen Keyboard".
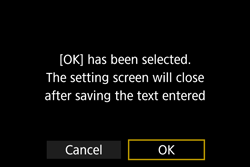
- Press the
 /
/  buttons to choose [OK] and press the
  button.
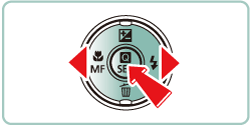 2. Press the / buttons to choose [
  ] and press the button.
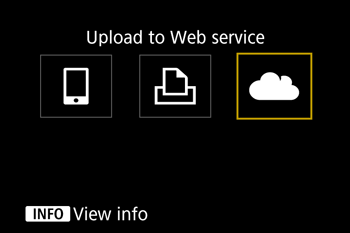
NOTE
On the screen shown below, you can switch to other screens by pressing the / buttons.
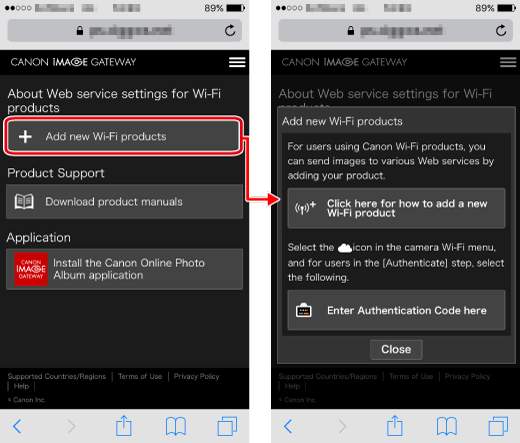
/ buttons. 3. Click on [Click here for how to add a new Wi-Fi product] on the page displayed for step 4 of [Sign in to CANON iMAGE GATEWAY].
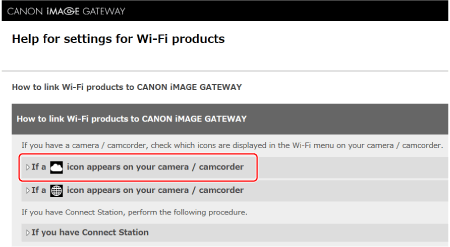
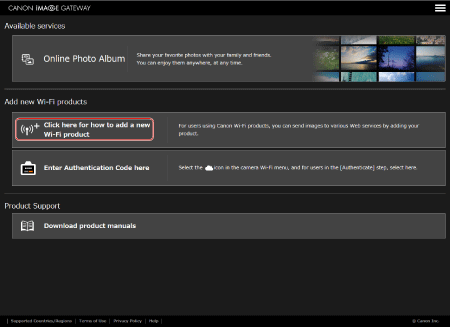 4. Click [How to link Wi-Fi products to CANON iMAGE GATEWAY.] > [If a
  icon appears on your camera/camcorder] and follow the on-screen instructions to complete the settings.
- Settings are made with a camera connected to an access point (router).
 5. After you have completed the settings, set [Display on product] to [ON].
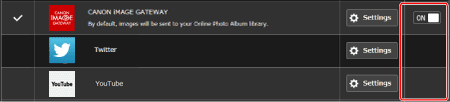 6. Press the / buttons on the camera to choose [
  ] , then press the button.
- If the icon for the desired Web service is displayed, the setting is complete.
IMPORTANT
- Make sure initially that your computer or smartphone mail application is not configured to block email from relevant domains, which may prevent you from receiving the notification message.
NOTE
- If any configured settings change, update camera settings by registering affected Web services on the camera.
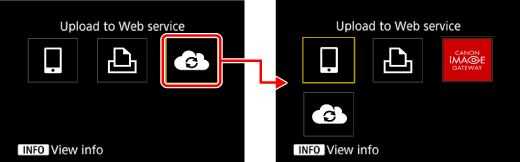
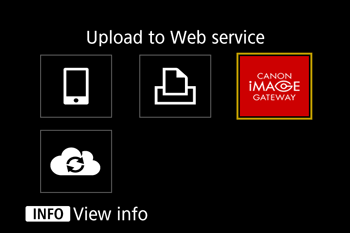
1. Press the / buttons to choose the icon of the transfer destination, press the button.In this example, the procedures are shown for CANON iMAGE GATEWAY.
 2. The following screen will be displayed.
 3. After the devices are connected, the image will now be displayed.
Press the / buttons to select the image to send, press the button.
/ buttons to select the image to send, press the button. 4. The screen for sending images will appear.
Press the / buttons to choose [ Send img shown ] , press the button.
/ buttons to choose [ Send img shown ] , press the button.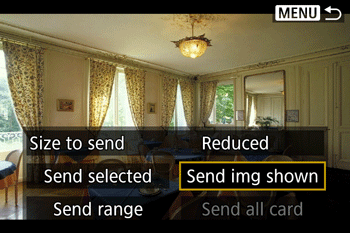
- The image selected will be sent.
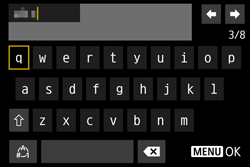
Use the on-screen keyboard to enter information. Note that the length and type of information you can enter varies depending on the function you are using.
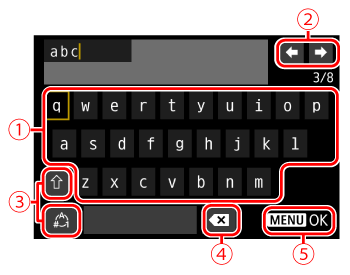
 | •Entering characters Press the  / /  / / buttons to choose the key of your desired character, and then press the button. / / buttons to choose the key of your desired character, and then press the button. |
 | •Moving the cursor Choose [  ] or [ ] or [  ] and press the button. ] and press the button. |
 | •Switching input modes Choose [  ], press the button to switch to capital letters. ], press the button to switch to capital letters.Choose [  ], press the button to switch to numbers or symbols. ], press the button to switch to numbers or symbols. |
 | •Deleting characters Choose [  ] and press the button. The previous character will be deleted. ] and press the button. The previous character will be deleted. |
 | •Confirming input After pressing the  button, press the / buttons to choose [OK], press the button. button, press the / buttons to choose [OK], press the button. |
NOTE
- To return to the previous screen, press the button.