Scanning Film with ScanGear (Simple Mode)
Giải pháp
ScanGear is the scanner driver software used for scanning documents and film. You can start ScanGear from an application program that supports TWAIN, an industry standard for acquiring images using external devices.
In Simple Mode of ScanGear, you can perform scanning by following simple instructions displayed on the window.
PhotoStudio is used as an example.
1.Remove the protective sheet and film guide from the document cover, set film into the Film Guide, and then set the Film Guide to the document cover
Windows:
Click the [Start] menu and select [(All) Programs] - [ArcSoft PhotoStudio 5.5], and click [PhotoStudio 5.5].
Macintosh:
Double-click the [PhotoStudio] alias on the desktop, or open [Applications] - [PhotoStudio] folders, then double-click the [PhotoStudio] icon.
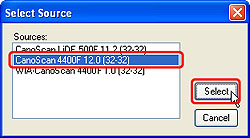
Select your scanner model in the [Select Source] window and click [Select] (Windows)/[OK] (Macintosh).
IMPORTANT
- Do not select the model name that includes [WIA] in it.
IMPORTANT
- You do not need to set it from the second time onward with the same scanner.
- You will need to do this step if you select a different scanner or a digital camera.
- With some applications, you may have to do this step every time you start the application.
ScanGear starts.
REFERENCE
- Click the [Simple Mode] tab if the [Simple Mode] window is not displayed.
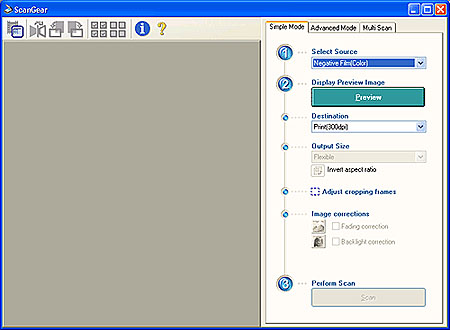
Select [Negative Film(Color)] or [Positive Film(Color)].
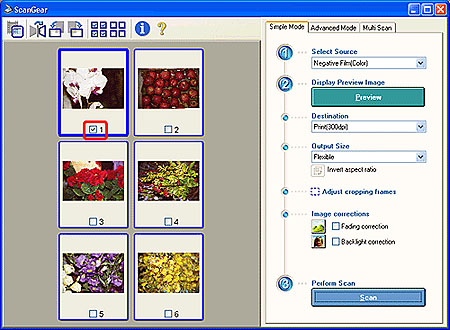
The thumbnail images are displayed in the preview area.
Check the frames you want to scan.
IMPORTANT
- If the preview image is not displayed correctly, correct the position of the film strip in the film guide and click [Preview] again.
Select [Print(300dpi)] or [Image display(150dpi)].
Output sizes available vary by the item you selected in [Destination].
| Item Selected in [Destination] | Output Sizes Available |
| Print(300dpi) | Flexible, 4" x 6" Landscape, 4" x 6" Portrait, A4, Letter, Add/Delete* |
| Image display(150dpi) | Flexible, 640 x 480 pixels, 800 x 600 pixels, 1024 x 768 pixels, 1600 x 1200 pixels, 2048 x 1536 pixels, Add/Delete* |
* You can register and/or delete custom settings in [Add/Delete].
The scanned image will be corrected accordingly.
After the scanning is completed, the scanning completed window appears.
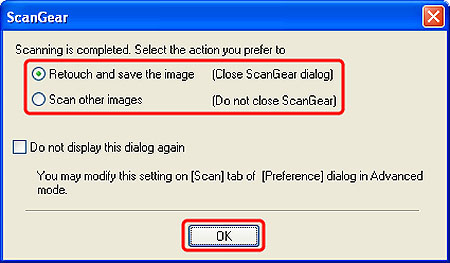
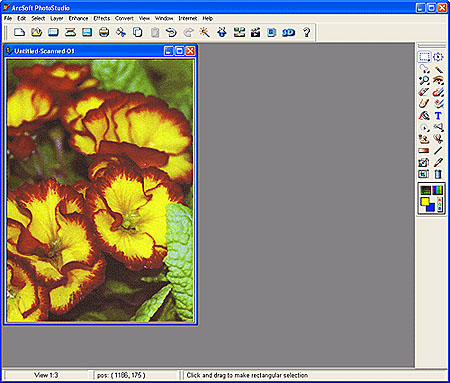
Select [Retouch and save the image] and click [OK] if finished with scanning. The scanned image is displayed in the ArcSoft PhotoStudio window for editing.
Select [Scan other images] and click [OK] to scan additional film strips.
IMPORTANT
- You can also click [X] at the top right corner to close ScanGear if the selection window is not displayed.