[Protected] is displayed and images cannot be erased (PowerShot G1 X Mark II)
Giải pháp
Protected images cannot be erased using the camera’s erasure function. To erase them this way, first cancel protection.
1. Press the camera's < > button.
> button.2. Press the <MENU> button.
3. On the [Playback] ( ) tab, press the <
 ><
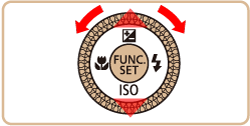
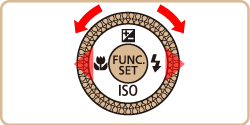
>< > buttons or turn the <
 > dial to choose [Protect], and then press the <
 > button.
) tab, press the <><> buttons or turn the <> dial to choose [Protect], and then press the <> button.
4. Press the <><> buttons or turn the <> dial to choose [Select All Images], and then press the <> button.
><> buttons or turn the <> dial to choose [Select All Images], and then press the <> button.
5. Press the <><> buttons or turn the <> dial to choose [Unlock], and then press the <> button.
><> buttons or turn the <> dial to choose [Unlock], and then press the <> button.
All protected images will be unlocked.
1. Press the camera's <> button.
> button.2. Press the <MENU> button.
3. On the [Playback] () tab, press the <><> buttons or turn the <> dial to choose [Protect], and then press the <> button.
) tab, press the <><> buttons or turn the <> dial to choose [Protect], and then press the <> button.4. Press the <><> buttons or turn the <> dial to choose [Select], and then press the <> button.
><> buttons or turn the <> dial to choose [Select], and then press the <> button.
5. Press the < ><
>< > buttons or turn the <> dial to choose the protected image you want to unlock. (The [
  ] icon appears on protected images.)
><> buttons or turn the <> dial to choose the protected image you want to unlock. (The [ ] icon appears on protected images.)Press the <> button.
> button.
6. The [ ] icon will disappear and the image will be unlocked.
] icon will disappear and the image will be unlocked.- To unlock other images, repeat step 5.
IMPORTANT
- Be careful when erasing images, because they cannot be recovered.
1. Press the camera's <> button.
> button.2. Press the <><> buttons or turn the <> dial to select the image you want to erase.
><> buttons or turn the <> dial to select the image you want to erase.3. Press the < > button.
> button.
4. After [Erase?] is displayed, press the <><> buttons or turn the <> dial to choose [Erase], and then press the <> button.
><> buttons or turn the <> dial to choose [Erase], and then press the <> button.
- To cancel erasure, press the <><> buttons or turn the <> dial to choose [Cancel], and then press the <> button.
NOTE
Pressing the < > button while [  ] images are displayed will give you the option of choosing [Erase
  ], [Erase JPEG], or [Erase + JPEG] for deletion.
> button while [ ] images are displayed will give you the option of choosing [Erase ], [Erase JPEG], or [Erase + JPEG] for deletion.